
Bread Machines and Their Bread Making Problems!
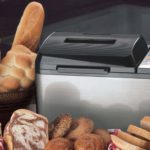
You’ve got a new appliance in your house, and it’s one of those smart machines that you’re not sure can do the basics. It’s a bread machine – just to be clear, it’s a machine that bakes bread, not one made of bread!
Here at Easy Kitchen Appliances, we love kitchen appliances that make life easy!
Because of that, we love Bread Machines because not only are they easy to use but they allow individuals with special diets to easily adhere to their diet while still eating delicious food.
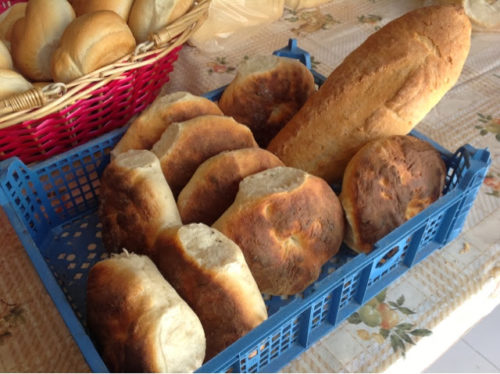
There are many reasons that you might have been persuaded to buy a bread machine for your household. One of them is that they are a great – and healthier – alternative to the bread you find in stores.
With the help of a machine like this (Best Bread Machine!), you’ll know exactly what ingredients are in your daily bread.
So, you made a healthy choice! But, as with every machine out there, you can’t just plug it in and expect it to work.
And when you do get your bread machine to work, it’s just a matter of time before something will go wrong.
Problems will occur. Therefore, before having to experience all of the results caused by such problems, let me fill you in on some of them and tell you how to avoid them.
Of course, all of these problems can be solved quite easily, and we all know how much we can gain from experience – but this is the age of information, therefore may I inform you?
Common Bread Machine Problems and How to Avoid Them
Let’s now dig into some of the most common bread maker problems that can occur when using a bread machine.
Bread Crust Too Thick
The first problem you may face – it may be as soon as you make your first bread – is a bread crust that is just too thick.
This can be solved easily and without much fuss. All you have to do is to get that steaming bread out of the machine as soon as the bake cycle ends.
This will prevent the bread from cooking further and, thus, forming a crust that is too thick.
Bread Crust Is Too Dark
Luckily, there are crust settings on your bread machine that will allow you to have a light crust, medium crust, or dark crust.
It doesn’t matter whether you’re baking a straight basic white bread recipe, french bread, or something much more complicated. Your bread machine can take it!
Active Dry Yeast Not Activating
Another issue you may face with your bread maker is that your yeast just doesn’t activate when it needs to. This can be avoided by making sure your ingredients are at room temperature before you start using them in the bread machine.
It’s just like with a basic oven – you wouldn’t keep the bread in there for too long as this might happen to that delicious crust.
Bread Flour Not Incorporated
This problem usually occurs when the ingredients for freshly baked bread are not mixed properly. This is why it’s important that you follow the instructions provided by the bread machine and make sure to mix your ingredients and your bread flour before starting the baking process.
You can also help solve this issue by slowly adding the bread flour during the kneading cycle. This will ensure that the flour is properly incorporated into the bread dough.
This will also help with your dough consistency.
Bread Rise Issues
The first thing you’d want to take a look at is the bread recipe that you are following and check the volumes of the ingredients in your bread machine.
You have to make sure they have been measured accordingly before making the bread mix. You might have too much liquid or not enough flour.
Another cause might be the temperature of the mentioned ingredients. All of the ingredients must be at room temperature, while liquids should be at 80 degrees F (probably higher than room temperature).
You may also have to check the yeast’s activity and if you use bread flour with low gluten content, make sure you’re using wheat flour, especially made for bread-making.
You can’t have the perfect loaf of bread if your bread won’t rise properly.
Bread Loaf Status – Small and Short
Let’s say you prepare dinner – and all of your family members will be home in time for it. You decide that, besides all of the other dishes, homemade bread would do the trick and make everyone happy. But what would your reaction be when you remove a short and small loaf out of the bread machine?
Well, you’d be unhappy – and if you are short on time, something like this should be avoided.
This is usually caused by too-dry dough, meaning that you were too generous with the flour.
This can be easily solved during the kneading cycle of the bread machine. All you have to do is balance the amount of flour by adding more whole wheat flour and a teaspoon of water – at a time, not only one – until everything looks normal.
It’s also a good idea to check the expiration date of your yeast and baking powder, as these two ingredients can cause issues when they are not in proper working condition.
Those were some of the most common bread machine troubleshooting problems – but you should never give up on freshly-made bread! With just a few quick tweaks, you can have delicious and perfectly risen loaves every time.
Mushroom-Shaped Bread
Naturally, we all know what a loaf of bread is supposed to look like. But there might be times when you’ll notice that the loaf your bread machine has made is shaped like a mushroom. Well, you bought a bread-making machine, not some sort of bread-mushroom hybrid machine.
To make that mushroom shape something of the past, you have to be sure that, when you dissolve the yeast, the water you use is not too warm. As we mentioned earlier, liquids should have a temperature of around 80 degrees F.
But this can also be caused by dough that’s too wet. In case of too dry dough, all you had to do was to just add flour and some teaspoons of water – in this case, you have to balance the ingredients by adding one or two tablespoons of flour during the kneading cycle.
In other words, be sure to pay attention when you’re following a bread machine recipe and make sure that the water is not too warm. Otherwise, your perfect loaf of bread might look like a mushroom instead of what it’s supposed to look like!
Bottom Burning or Top Not Browning Enough
How depressing would it be if you made a beautiful loaf of bread only to find that it’s burned on the bottom and not browned enough on the top? Sure, you could cut off the burned part but then, your guests would think that your baking skills are sub-par.
Luckily, there is a simple solution – make sure you check the heat setting in the machine. It’s possible that the heat is too high, so you have to adjust it accordingly.
Also, note if your bread machine has a “browning” feature – this adds more minutes to the baking cycle and should guarantee an evenly browned top. If you’re not sure how to use this specific setting on your machine, make sure to consult the manual – it should have all the answers.
Doughy Center of the Bread
This can be the result of two human errors and one error related to the bread machine itself. If you catch your bread having a doughy center, the first thing you should do the next time you make some bread is to decrease the amount of liquid and check the yeast activity from time to time.
As we have mentioned, the ingredients’ value must follow the recipe closely – as drifting just a bit away from the recommended amounts can lead to bad-looking loaves of bread or even some that cannot be eaten.
Still, if you know you’ve followed the recipe properly and the doughy center still appears, then you should consider that the bread machine might be malfunctioning.
Naturally, the first thing to grab onto is the user’s manual and see what can cause this – and then, if the problem persists, you might have to take the machine to a service and get the problem solved.
Bread Raw on Top
Sometimes, bread can come out of the bread machine presenting an open texture, being raw on top or even collapsing – just like with the soufflés!
This is usually caused by the presence of too much yeast – but worry not, all you have to do is just a little adjustment of the yeast amount downward by 1/8 to ¼ teaspoon.
Also, the collapse, rawness, and open texture can be caused by either too much flour in liquid or too little flour.
Usually, adding one or two tablespoons of flour solves this problem and you will be welcomed by a nice, good-looking rye bread as soon as the baking cycle ends.
Bread Machine Tips and Tricks to make sure you keep in Mind!
As a bonus, keep these bread maker tips in mind when making bread, in order to come out with the best bread possible!
1. Always follow bread recipes closely – as a little bit of deviation can give you unexpected results.
2. Check the expiration date on the yeast and make sure it’s still active before adding it to the ingredients. If your bread rose too much, then this might be it.
3. When dissolving the yeast, be careful not to use too warm water (around 80-85F). This can kill the yeast and ruin your bread.
4. When in doubt, check the user’s manual – it will usually have all the answers you need! Making bread in a bread machine should be easy once you get the hang of it!
The Bread Pan
If you ever get stuck at the bread machine because your baking pan doesn’t stick in the slot or it doesn’t move as expected, then this might be caused by some debris or dirt that has clogged up the parts.
To fix this issue, take out the bread pan and clean it with a damp cloth – if there are any persistent spots, you can use a soft-bristled brush.
Also, don’t forget to check the rotating shaft of the machine if it’s not clogged up with dirt or debris as well, and then reinsert the pan back in its slot.
Kneading Paddles
Kneading paddles are usually subject to some wear and tear, as their job is to mix the dough and make sure no lumps are left inside.
If you find that your bread pan has trouble rotating or that it’s not kneading properly, then this might be caused by a broken paddle. If that’s the case, then you should contact the manufacturer and get a replacement for it.
Also, check your user’s manual to see how to replace it – as this part of the machine requires special attention and care in order to make sure everything is done properly.
Conclusion – Bread Maker Troubleshooting
Troubleshooting a bread machine is no easy task – but with the tips and tricks provided in this article, you should be able to gain the knowledge necessary to have your machine working flawlessly.
It can seem complicated at first. Too much yeast, too much salt, too much flour, not enough flour, wrong measuring cup, use all-purpose flour not bread flour! All of these terms can cause our heads to spin. However, baking bread in a bread machine is still much easier than baking bread in a conventional oven!
Just remember to always follow the recipe closely – as it’s usually easier to fix human errors than fixing electronic issues! Good luck, and happy baking!

7 thoughts on “Bread Machine Troubleshooting”
Help!
Every time I make bread it sticks to the pan and when I eventually get it out the paddles are still in it, I have tried oiling the pan before I start the bread maker but it’s still happening. It’s a 2lb loaf pan. Hardly used so still like new.
My bread rises fine in the machine but halfway through it falls and the end result is a hard yellowish mass hardly edible.
My bread crust is to hard and thick. I do take the bread out as soon as it’s ready. What I’m I doing wrong
My bread crust is to hard and thick. I do take the bread out as soon as it’s ready. What I’m I doing wrong”
my hamilton finch breadmaker has started leaving a back residue in the mixed dough. it is thoroughly washed after every use. The source appears to be near the mixing paddle
My bread comes out of bread maker in a hard ball, half the size of bread pan, why is this please.??